Implementation
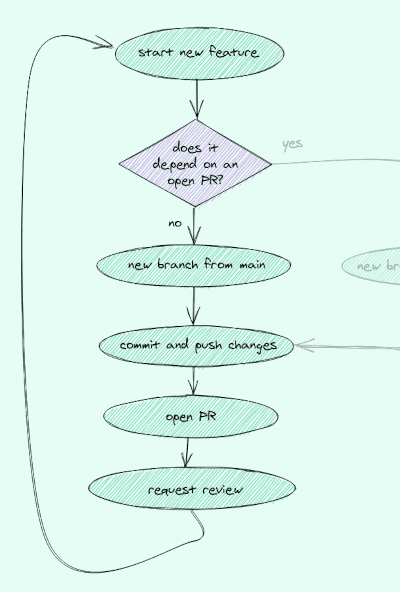
We want to develop a new feature. That means we are on the left side below Feature Implementation.
We start the new feature Header. Since it's the first feature there aren't any open PRs it could depend on.
So the first thing we do is create a new branch from main.
Note: When working with Git you might be used to the name
masteras the main branch. GitHub, like other companies, decided to rename themasterbranch tomainto remove references to slavery. So if you're confused just make a note in your headmain = master
Create a new branch
As a branch name, it's always good to choose something descriptive. Most teams have some convention that involves the name or ID of the task they work on in some form. In this course, we will use the name of the task.
Go ahead, open the command line, and create a new branch called header with the following command.
git checkout -b header
The checkout command in combination with the -b option creates a new branch from the current branch (main) and checks it out.
Note: We use the command line in this course because it's most flexible. Using the CLI can seem a bit scary at first but you'll get used to it with a bit of practice. I personally often use a combination of the VS Code Git integration plus the command line.
The next step on the roadmap is commit and push changes.
Commit and push changes
Before we can commit anything we need to write some code. Since this course is not about learning or using a particular language I'll provide the code here. You just have to copy & paste it.
Note: Please make sure that the files on your machine have the same content as shown here. Some lessons will only work correctly if the files are identical.
First, open the file src/index.html in your favorite editor and adjust the content of the body tag as shown in the highlighted lines. You can also copy the whole code.
<!doctype html> <html lang="en"><head> <meta charset="utf-8"> <title>GitHub Flow Course</title> <meta name="description" content="GitHub Flow Course"> <meta name="author" content="Johannes Kettmann"> <link rel="stylesheet" href="https://cdnjs.cloudflare.com/ajax/libs/normalize/8.0.1/normalize.min.css"> <link rel="stylesheet" href="styles.css"></head> <body> <header class="header"> Header </header></body></html>We'll add some styles in a bit. Usually, it would make more sense to commit the changes in the markup and the styles together. But for the sake of the practice let's create a commit with this small code change already.
git add .git commit -m "Add header markup"Next, we add the styles. Open the file src/styles.css and add the highlighted lines.
body { font-family: Arial, Helvetica, sans-serif; font-size: 18px;} .header { height: 50px; display: flex; justify-content: center; align-items: center; border-bottom: 1px solid black;}Let's create another commit for the styles.
git add .git commit -m "Add header styles"Perfect. We're done with the implementation. Let's have another look at the roadmap to see where we're at.
We're currently at the step commit and push changes. We committed already so we only need to push to GitHub.
git push origin header
origin in the above command is the remote repository we want to push to. Here, that's our repo on GitHub.
Hint: You can list all remote repositories including their URLs by running
git remote -v.
Next: Open a Pull Request
